** UPDATE ** This page continues to get a lot of traffic, however I no longer recommend the workflow used here, and the tech stack described here is out of date. Due to the complexity of reliable streaming, and the need for available support when things go wrong, I recommend you look to Resi: https://resi.io
Multi-site Part 1 - Primary Site & Cloud Server
This is part-1 of a 2-part series on multi-site streaming. If you haven't yet read the introduction, please do so here.The easiest way to communicate this workflow is through a case study. We will be looking at Chase Oaks Church, a single organization with multiple campuses across the Dallas, TX area. The primary campus is in the suburb of Plano, and is called Legacy. At the Legacy campus the pastor's message is streamed live to the remote campuses, where it is captured in a DVR-like manner and played-back whenever each campus is individually ready. Most of the remote campuses begin their service 30-minuets after Legacy, allowing time to set message start-points and capture the stream in a fashion that allows for buffer-free playback; but the delay could be safely shorted to 2-3 minuets if necessary.
Because Chase Oaks plans to open additional campuses over the next years, a bandwidth-scalable solution was needed in terms of upload ability. In order to accommodate, Chase Oaks sends its live-stream to an off-site data-center, where each remote campus pulls from. The data-flow is described below:

At the Legacy campus the audio and video feed is embedded on a single HD-SDI cable and captured by a PC with a BlackmagicDesign Decklink Mini Monitor capture card (HDMI could alternatively be used). The feed is then encoded using Microsoft Expression Encoder and sent to Microsoft IIS running on the same computer. The local IIS then pushes the stream to a server in a datacenter also running IIS. At the remote campuses, the stream is pulled from the datacenter IIS and recorded to another instance of IIS which is on the same computer as the client-playback application (or at-least running on a computer on the same local network, where connectivity would never be interrupted). This configuration provides end-to-end TCP stream-delivery (vs UDP delivery with non-http protocols), as well as network auto-recovery, resulting in an excellent playback experience. Detailed steps for configuration are below.
Capturing Pro Audio/Video for Encoding
In order to stream to IIS you must use an encoder that supports Microsoft Smooth Streaming. Currently appliance encoders that support Smooth Streaming are very expensive ($8,000+) because they enable transcoding to multi-bitrates on the fly; but because multi-site solutions generally do not need to account for delivering content to end-users on unreliable networks there is no need for multiple bitrates. As of 7/2014 I am working with a company who has agreed to extend their low-cost RTMP streaming appliance with Smooth Streaming, but final implementation is months away. In the mean time, the affordable alternative is to use a PC running Windows 7 or 8 as your encoder.
To capture professional audio and video (delivered over HD-SDI or HDMI) onto the Windows computer you need a capture device. BlackmagicDesign makes a variety of affordable capture card products in their Intensity and Decklink lines. Unfortunately, their products have very particular compatibility requirements, so it's imperative to use a computer with a certified-compatible motherboard. Check the BlackmagicDeisgn site for compatibility documents. (Have you found a good pair using a pre-built laptop or desktop? Please comment with the configuration)
In the case of Chase Oaks, a custom computer was built with a budget of $1,260. You can view the components used in this document. You do not need these exact components so-long-as you meet your capture-card requirements, but in order to take full advantage of the encoder software (by offloading work from the CPU to the GPU) you should use an NVIDIA CUDA-accelerated GPU. If you need an example walk-through of building a computer, you can find one here. Once the computer is ready and the BlackMagic drivers are installed, continue to install the encoding software.
Install Microsoft Expression Encoder
One of the only software-based Smooth Streaming encoders available is Microsoft's very own Expression Encoder. In order to stream to an IIS Publishing Point (required for this solution), you must have Expression Encoder Pro -- which is no longer sold by Microsoft or it's partners (see here). Thankfully, after much requesting, I was able to secure an installer of the Encoder 4 Pro SP1 version. Download and install the SP1 version, then update to the SP2 version. (Note: to install the SP1 version you must mount the ISO -- you can do this with the free version of Dameon Tools Lite; be sure to uncheck the "add-ons" when installing).
Configure your Expression Encoder Profile
Open Expression Encoder, select "Live Broadcasting Project," and click "OK." In the "Preview" window, click "Add a Live Source". In the "Live Sources" window, click to drop-down the "Video Device" list, and select your capture device -- in the case of Chase Oaks, it's "Decklink Video Capture." Now click "Configure" under the Video Device, and set the "Video Format" to match the incoming video signal (for example, HD 720p 59.94 4:2:2 YUV), and click "OK." You should see a preview of your video source if you set it correctly. Now drop-down the "Audio Device" to set your audio input device; in the case of Chase Oaks it is "Decklink Audio Capture." Click the "Configure" button for audio, set your audio format, and click OK.
Now move to the "Encode" tab, and configure the following:
- Output Format: IIS Smooth Streaming
- Video: H.264 - High
- Audio: AAC-LC
Expand the Video tab, and configure the following (or customize as needed for your solution):
- Mode: CBR-1 pass
- Buffer Window: 4 seconds
- Frame Rate: 29.97 fps
- Key Frame Interval: 2 seconds
- Bitrate: 4200 kbps
- Width: 1280
- Height: 720
Expand the Audio tab, and configure the following (or customize as needed for your solution):
- Channels: Stereo
- Bitrate: 256 kbps
- Sample Rate: 48 kHZ
- Bits Per Sample: 16
Expand the Pre-Processing tab. This tab will have the greatest effect on the look of your video, and you will need to use trial-and-error if you are using an interlaced signal. Chase Oaks is not, so below are the configuration settings:
- Deinterlacing: Force Off // (Try "Force bob" if you have an interlaced signal)
- Resize Quality: Bi-linear
- Volume: 1
Now move to the "Output" tab and check "Publishing Point." Under "Location", add: "http://localhost/Ingest.isml" (without the quotes). We will configure this Publishing Point in the next section. Click the small arrow under the text "Learn more about IIS Live Smooth Streaming," and check "Automatically update on restart." Now save your profile -- you are finished configuring Expression Encoder.
Microsft IIS 7, Media Services 4.1, and the Live Smooth Streaming Extension
The heart of this multi-site solution is Microsoft Internet Information Services 7 and the Media Services extensions built on top of it. This server can be installed at no cost on Windows Vista, Windows 7, and Windows 8. Just go the the Windows Control Panel > Programs > Turn Windows Features On/Off, check "Internet Information Services," and click OK. If needed, further installation instructions can be found here.
Once IIS is installed, use the Microsoft Web Platform Installer to install Media Services with Live Smooth Streaming. At this point, I've found it easiest to restart the computer to ensure all components are fully running. Once the reboot is complete, search for "Internet Information Services (IIS) Manager" in the start menu and open it. I recommend pinning this to your taskbar. Verify that you can see "Live Smooth Streaming" under the "Media Services" section at the top-level hierarchy. Now it's time to configure!
Configure a Publishing Point
Next you should familiarize yourself with this post: "Getting Started with IIS Live Smooth Streaming," as it will help you understand the following steps.
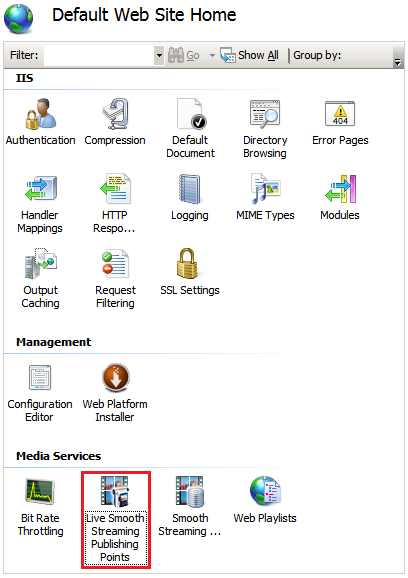 Within the IIS "Connections" window, expand [Your Computer Name] > Sites, and click on "Default Web Site." Now double-click "Live Smooth Streaming Publishing Points" under "Media Services."
Here we will create a new Publishing Point, which we will encode-to from Expression Encoder.
 In the actions pane, click "Add."
In the "Add Publishing Point" dialog box, on the "Basic Settings" tab, enter the following information:

Save and close the file.
Setup a Cloud Server
In order to avoid running-out of bandwidth upload capacity, Chase Oaks' remote campuses pull their streams from a server at an off-site data-center. Setting up a server in a data-center is actually quite easy. One option is to use an Amazon EC2 instance... but keep in mind you will have virtually no control over the routes the data takes to get to the server, and you might notice that the data has to travel very far and often does so very inefficiently. Another option is to use a company like Softlayer, or Rackspace. These companies might have a data-center in your area, and you can request a server at any one of their data-centers. Creating an account is simple, and the cost of a usable server -- which usually includes a few TB of outbound data (inbound data is free)-- is around $90/month. 5TB should be enough for 5+ remote sites running 2 live services per weekend at 720p (HD). Chase Oaks uses a 2-core VM with 2 GB of RAM running Windows Server 2012, and has an add-on local hard-drive with 100GB for storage. The storage is used to DVR the stream content, which serves as a backup-source for the remote clients if for some reason the primary method fails.
Configure the Cloud Server
Once you have decided on a provider and they have setup your server and provided you with remote access credentials, connect to the server. We will need to configure this server with many of the same settings as your local IIS, so the following steps will have some similarities... but don't rush because there are some differences. Since you will most likely be running a version of Windows Server, IIS may already be installed. If it is not, just enable it with the same steps as above (thorough the "Windows Features" menu). You will need to install Media Services with Live Smooth Streaming. Reboot once installed for assurance. Once reboot is complete, it's time to configure the Publishing Point that will receive the stream from the primary campus.
Open IIS. At the top level of the "Connections" pane, click [Server Name]. Now double-click "Live Smooth Streaming" under "Media Services" -- If you plan to DVR content on this server, set the "Archive Path" to the appropriate drive. It is very important to set this to a drive that has enough storage for your stream. Chase Oaks' is set to the add-on local hard-drive.
Next, navigate to [Computer Name] > Sites > Default Web Site, and double-click "Live Smooth Streaming Publishing Points." In the "Actions" pane, click "Add."
In the "Add Publishing Point" dialog box, on the "Basic Settings" tab, enter the following information:
For stream testing and as a backup, download this zip file containing a Silverlight HTML player onto the server, and extract the contents to c:\inetpub\wwwroot. Open the "players" folder, and open the "player.html" file in a text-editor. On line 67, replace "[Your-Cloud-IP]" with the external IP of your cloud server. Save and close the file.
In order to access this HTML document any other place besides localhost, place this clientaccesspolicy xml file at c:\inetpub\wwwroot (it's a Silverlight thing).
Configure Push from the local IIS to the Cloud IIS
Now that we have the IP address of the cloud server, we need to configure the local IIS Publishing Point to push the stream to the cloud IIS. Back within your local IIS, navigate to your Publishing Point ([Computer Name] > Sites > Default Web Site, Live Smooth Streaming Publishing Points). Right-click "Ingest.isml" and click Edit. Move to the "Advanced Settings Tab," and under "Push to the following publishing points" click "Add." Within the URL field, add: "http://[Your-Cloud-IP]/PrimaryStream.isml" and click "OK." (Note: here is where you would add additional backup servers, see here for more detail).
Congratulations! You are finished configuring your local and cloud IIS!
Encode your Smooth Stream to the local IIS Publishing Point
Next you should familiarize yourself with this post: "Getting Started with IIS Live Smooth Streaming," as it will help you understand the following steps.
Within the IIS "Connections" window, expand [Your Computer Name] > Sites, and click on "Default Web Site." Now double-click "Live Smooth Streaming Publishing Points" under "Media Services."Here we will create a new Publishing Point, which we will encode-to from Expression Encoder.
In the "Add Publishing Point" dialog box, on the "Basic Settings" tab, enter the following information:
- File name: Ingest
- Live source type: Push
- Uncheck "Archive media"
- Uncheck "Allow client connections"
- Check "Allow server connections" (we will re-visit this later)
- Check "Start publishing points automatically upon first client request"
Click OK to add the Publishing Point.
Next, navigate (via My Computer) to c:\inetpub\wwwroot, right-click Ingest.isml, and open with notepad (or other plain-text editor, such as Notepad++). Add the following line at the bottom of the meta list:
<meta name="restartOnEncoderReconnect" content="true" />
Save and close the file.
Setup a Cloud Server
In order to avoid running-out of bandwidth upload capacity, Chase Oaks' remote campuses pull their streams from a server at an off-site data-center. Setting up a server in a data-center is actually quite easy. One option is to use an Amazon EC2 instance... but keep in mind you will have virtually no control over the routes the data takes to get to the server, and you might notice that the data has to travel very far and often does so very inefficiently. Another option is to use a company like Softlayer, or Rackspace. These companies might have a data-center in your area, and you can request a server at any one of their data-centers. Creating an account is simple, and the cost of a usable server -- which usually includes a few TB of outbound data (inbound data is free)-- is around $90/month. 5TB should be enough for 5+ remote sites running 2 live services per weekend at 720p (HD). Chase Oaks uses a 2-core VM with 2 GB of RAM running Windows Server 2012, and has an add-on local hard-drive with 100GB for storage. The storage is used to DVR the stream content, which serves as a backup-source for the remote clients if for some reason the primary method fails.
Configure the Cloud Server
Once you have decided on a provider and they have setup your server and provided you with remote access credentials, connect to the server. We will need to configure this server with many of the same settings as your local IIS, so the following steps will have some similarities... but don't rush because there are some differences. Since you will most likely be running a version of Windows Server, IIS may already be installed. If it is not, just enable it with the same steps as above (thorough the "Windows Features" menu). You will need to install Media Services with Live Smooth Streaming. Reboot once installed for assurance. Once reboot is complete, it's time to configure the Publishing Point that will receive the stream from the primary campus.
Open IIS. At the top level of the "Connections" pane, click [Server Name]. Now double-click "Live Smooth Streaming" under "Media Services" -- If you plan to DVR content on this server, set the "Archive Path" to the appropriate drive. It is very important to set this to a drive that has enough storage for your stream. Chase Oaks' is set to the add-on local hard-drive.
Next, navigate to [Computer Name] > Sites > Default Web Site, and double-click "Live Smooth Streaming Publishing Points." In the "Actions" pane, click "Add."
In the "Add Publishing Point" dialog box, on the "Basic Settings" tab, enter the following information:
- File name: PrimaryStream
- Live source type: Push
- Uncheck "Archive media"
- Check "Allow client connections"
- Check "Allow server connections"
- Check "Start publishing points automatically upon first client request"
Click OK to add the Publishing Point.
Now open Windows Firewall > "Allow an app or feature through Windows Firewall". Check "World Wide Web Services (HTPP) for Private and Public networks, and click "OK".
Next, navigate to c:\inetpub\wwwroot, right-click PrimaryStream.isml, and open with notepad (or other plain-text editor, such as Notepad++). Add the following line at the bottom of the meta list:
<meta name="restartOnEncoderReconnect" content="true" />
Save and close the file.
For stream testing and as a backup, download this zip file containing a Silverlight HTML player onto the server, and extract the contents to c:\inetpub\wwwroot. Open the "players" folder, and open the "player.html" file in a text-editor. On line 67, replace "[Your-Cloud-IP]" with the external IP of your cloud server. Save and close the file.
In order to access this HTML document any other place besides localhost, place this clientaccesspolicy xml file at c:\inetpub\wwwroot (it's a Silverlight thing).
Configure Push from the local IIS to the Cloud IIS
Now that we have the IP address of the cloud server, we need to configure the local IIS Publishing Point to push the stream to the cloud IIS. Back within your local IIS, navigate to your Publishing Point ([Computer Name] > Sites > Default Web Site, Live Smooth Streaming Publishing Points). Right-click "Ingest.isml" and click Edit. Move to the "Advanced Settings Tab," and under "Push to the following publishing points" click "Add." Within the URL field, add: "http://[Your-Cloud-IP]/PrimaryStream.isml" and click "OK." (Note: here is where you would add additional backup servers, see here for more detail).
Congratulations! You are finished configuring your local and cloud IIS!
Encode your Smooth Stream to the local IIS Publishing Point
When you're ready to stream, open your Expression Encoder profile that you saved earlier. With our device, we have found that the fps sometimes needs to be re-configured within Live Sources > Video Device -> Configures. Once everything is set, under the "Output" tab, click "Connect." A dialog will popup asking for credentials, leave the fields blank and click "OK." Now click "Start" in the Preview area. Another dialog will popup asking for credentials, click "OK." (For information about setting up authentication for encoder streams, see here.). That's it -- you're streaming to your local IIS Publishing Point, which is pushing the data to your cloud IIS!
To verify/monitor the stream within IIS, click on the Publishing Point, and then click "Details" in the Actions pane. Here you can view sources and destinations, bitrates, and more.
Next Steps
After you have finished this configuration, you're ready to move on to Part-2: Receiving/Playback Site (estimated 8/22/14).


.JPG)